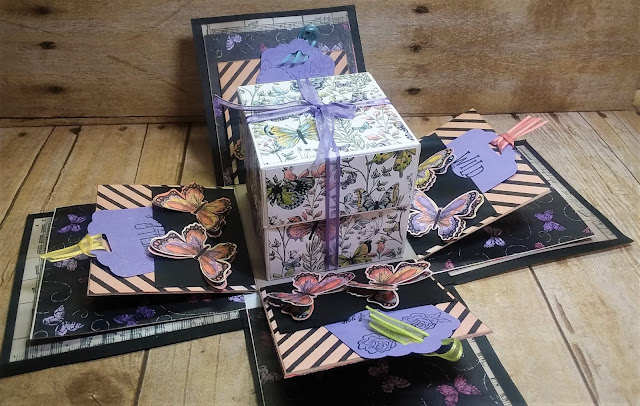
World's Greatest Explosion Box
I have loved making these simple explosion boxes Adding candy just makes it quick and easy too. I used some products from this months Paper Pumpkin Kit August 2020. I've given these out to lots of people and even had my grandchildren make them with me too for a fun memorable activity...of course they love the candy treats too.
Measurements and Supplies:
From Worlds Greatest Paper Pumpkin Kit you will need the following.
All 3 Pacific Point Card Bases, 1 White Card Base, Stamp Set, 4 Gold Foil Banners, 1 Scalloped Gold Foil Medallion, 4 small white circles, 1 large White Rectangle(Pacific Point Ink Spot, dimensionals and glue dots if you wish to use them from kit)
12" X 12" Seaside Spray Cardstock (or choose your favorite)
9" X 9" Seaside Spray Cardstock (I used white from DSP pack)
6" X 6" Seaside Spray Cardstock
4" X 5" Pacific Point Cardstock
1-1/2" X 8-1/2" Seaside Spray
Small Circle punch I used both a 1 3/8" and 1" punch (retired)
1 Tiny Treat Box
Old world Map 3 D Embossing Folder
Trimmer
Stampin Seal.
Liquid Glue
Candy
Directions: Large bottom box
Score 12" X 12" Cardstock at 4" on all 4 sides, cut of all 4 corners so you are left with a + (plus)
Stamp ribbon image, on all 4 sides of largest plus
Punch 4 circles no larger than 1-1/2" in Pacific Point
Stamp sentiments on 4 small white circles from kit
Cut gold banners in half and cut a banner cut on the ones that have straight ends.
Add stamped circles to blue circles and add gold banners behind and adhere with dimensionals on the stamped rosettes.
Using White card base first cut a 3-3/4" X 3-3/4" piece then Stamp medal and sentiments and punch out with 1" circle punch, or use trimmer. Adhere all these to your candy.
Inside :adhere candy on each of the 4 sides.
Directions for 9" layer box
Score 9" X 9" Cardstock at 3" on all 4 sides, cut off all 4 corners
Cut the 2 Pacific blue pattern card bases length wise at 3"
Cut 4 - 3" X 3" Pacific blue pattern pieces and cut one strip at 1-1/4" X 8-1/2(for tiny treat box)
Cut 4 - 3/4" X 3-7/8 pacific blue pattern (for sides of lid)
Cut out 4 small 1/4" X 1-3/4" pacific blue pattern ( for top of lid)
Inside : Adhere candy.
Using liquid Glue stick to larger plus in center
Tiny treat box:
Fill with candy and wrap with Seaside Spray cardstock then with patterned blue card base piece.
Lid:
Score 6" Square at 1" on all 4 sides, cut up corners to score lines, miter all tabs, glue on small patterned pieces on sides. Emboss 3-3/4 white square and glue to center of lid, Cut out medal and add medallion and sentiment add with dimensionals to top of box, add 1/4" pieces to all 4 corners and trim, Adhere lid tabs.
Video Tutorial
Additional photos


