Pages

Saturday, September 9, 2017

I"M THANKFUL FOR YOU CARD


What you will need:

8 1/2" X 5 1/2" Very Vanilla Thick Card Stock
Scrap piece of Very Vanilla (For punched sentiment)
1/2" X 4 1/4 Berry Burst Card Stock
Sunflower from Painted Harvest Set (stamped and cut out for mask)
Painted Harvest Stamp Set
Daffodil Delight Ink Pad
Berry Burst Ink Pad
Tip Top Taupe Ink Pad
Early Espresso Ink Pad
Old Olive Ink Pad
Snail Adhesive
Stampin Dimensional's


Score Very Vanilla Thick Card Stock at 4 1/4. Fold and burnish with bone folder for a nice crisp looking edge.


Using large sunflower stamp in daffodil delight ink and stamp 3 images onto card front


Now take the 2nd smaller detailed sunflower stamp in Berry Burst and stamp over the top of daffodil delight image.


Then take the flower center and stamp the middles in Tip Top Taupe and then the little spot stamp in center with Early Espresso ink. 


Now take your mask (sunflower cutout) and place over the first sunflower so you can add the leaves. We do this so the leaves look like they are under the sunflower not on top of it. Now ink up your detailed leaf stamp in Old Olive and stamp off onto scrap paper before applying on card, (2nd generation stamping) just makes the ink a little lighter


Now Stamp sentiment on Very Vanilla Scrap using Berry Burst Ink.


Then punch out with the "Pretty Label" punch


Using snail adhesive put Berry Burst strip about 1" up from the bottom and add sentiment with dimensional's.

I hope you enjoy making this card. I absolutely love the Painted harvest stamp set. There are so many color combinations you can use. I made some bookmarks with different combinations I liked when i first got this stamp set I wrote the colors on the back of each, this way i won't have to figure them out again and i just keep them in the case with the stamps.

Please comment or subscribe, I would love your feedback. I am going to attempt my first You Tube video soon. 

You can purchase these items and more by clicking on the item photo's below.


Tip Top Taupe Classic Stampin' Pad
[138325]

Thursday, September 7, 2017

HERRINGBONE TECHNIQUE - ALL OCCASION CARD SET


What you will need: ( Multiply by 6 for set)

 8 1/2" x 5 1/2" Very Vanilla Card Stock (Scored at 4 1/4")
 4" x 5 1/4" Calypso Coral Card Stock
3 3/4" x 5" Very Vanilla Card Stock
4 1/2" x 3" Calypso Coral Card Stock
3 1/2" x 2" Very Vanilla Card Stock
Petal Garden Designer Series Paper Stack
Multipurpose Adhesive Sheets
Special Celebrations Stamp Sets 1 & 2
Lots of Labels Framelits
Acetate Card Box
Calypso Coral Ink Pad
9" Calypso Coral Ribbon (or enough to make a bow)
3 Rhinestone Jewels
 Multipurpose Liquid Glue
Glue dots


Would make a lovely gift in one of the acetate card boxes. Decorate as you like.

Cut your Petal Garden DSP strips in various widths. (You can use the excess pieces when we trim them for the next card).

Cover the 3 3/4" x 5" Very vanilla card stock with Multipurpose Adhesive. (I used tear tape as I don't have the sheets yet) Peel off the backing.


After you have applied all your strips turn it over so you can see where to trim.


Trim all the paper of and you can re-use most of it as long as you cut it straight again (on one end).

Apply herringbone to Calypso Coral cardstock then apply both to very vanilla card.  Using your big shot, die cut labels using  #4 (Counting from the smallest up) in Very Vanilla and label #5 in Calypso Coral.


I used Special Celebrations 1 of 2  stamp set for sentiment on front "This card is filled with love...). There are lots to choose from.  (Adjust label size if doing a different stamp)


I added a strip of the Petal Garden DSP on the inside as well as the sentiment
from Special Celebrations 2 of 2 "and hugs and happiness and hope from my heart straight to yours".  To complete the card i added some clear rhinestones to the front and a bow made with calypso coral ribbon. My other cards are ready for me to put sentiments on.


Please comment or subscribe, I would love your feedback.
You can purchase these items and more by clicking on the item photo's below.


Product List

Sunday, September 3, 2017

PASTEL DAISY THANK YOU CARD


What you will need:

5 1/2" x 8 1/2" Whisper White Thick Card Stock.
4" x 5 1/4" Berry Burst Card Stock
3 3/4" x 5" Whisper White Card Stock
Whisper White for 3 daisies, 2 small flowers and 2 leaves  (Scrap pieces)
1/2" x 6" Glimmer/glitter paper
Aqua Painter filled with water or alcohol (Alcohol spreads smoothly and dries quickly)
Daisy Delight Stamp set
Daisy punch
Small flower punch
Daffodil Delight Ink Pad
Berry Burst Ink Pad
Pear Pizzaz Ink Pad
Clear Faceted Gem
Tombow Liquid Glue, Adhesive and Glue dots


Score Whisper White thick card stock at 4 1/4", Fold and burnish.
Center glued Berry Burst card stock to card base, set aside.

Punch out 3 daisies and 2 small flowers from whisper white cardstock.

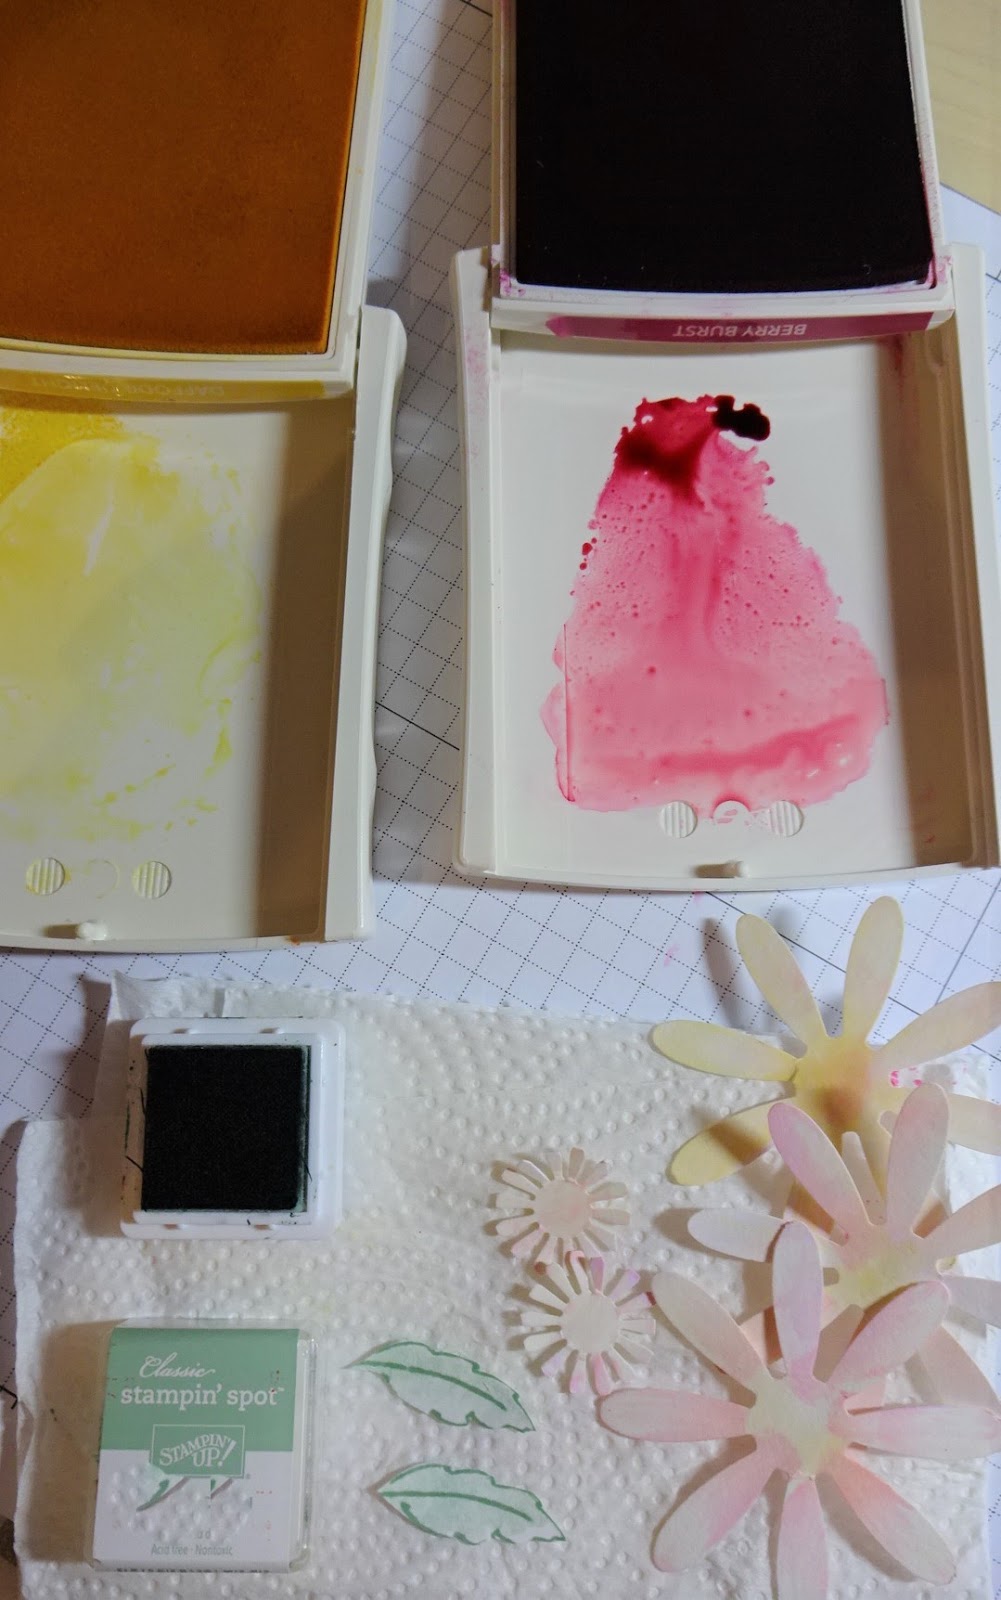
Put the 2 leaf stamps on small blocks. Using Pear Pizzazz ink  - stamp in ink then stamp off on scrap then stamp on whisper white, repeat. Then stamp over top with detail leaf in Pear Pizzazz and repeat on 2nd leaf. Cut them both out with paper snips.

Now take 3 3/4" x 5" Whisper White, 3 daisies and 2 small flowers. Take Berry Burst ink pad and squeeze center to create ink pool on lid.  Drip one or 2 drops of alcohol from aqua painter and blend.


Now "paint" until desired effect on card front and flowers, wipe of on paper towel between colors and clean lid before closing ink pad. Repeat same process with daffodil delight. Let dry or use heating tool to speed up.

To shape flowers gently bend petals with bone folder,glue together offsetting petals You can use dimensionals here but the flower is already quite thick without them. Do the same with small flowers and glue in center of daisy. Add clear faceted gem. Add "Thank You" sentiment in lower right using Berry Burst ink


Add Glimmer paper diagonally across card front using adhesive of choice (Cut off excess) Now place completed flower and leaves on upper left portion of card front with glue dots.

You can purchase these items and lots more by clicking on the items you wish to order.


Coloring Dazzling Diamonds Glimmer Paper

What you will need.

     Glimmer paper (cut to size you need)
     Ink pad of your choice.
     Aqua Painter.

Press the top of the ink pad to get the color in the lid. Flip open and dip your aqua painter brush into the ink. Brush onto the Glimmer Paper, repeat until you have your desired color. Let dry.

You can purchase these items from my Stampin Up store by clicking on them